
CryptoCAN is an encryption scheme for CAN messaging developed by Canis Labs. It’s designed to fit the publish/subscribe method of communication that CAN was designed for, and has a simple job: take a plaintext CAN frame, convert it into two ciphertext frames for broadcast on CAN, and at receivers, push these frames through a decoder to get back to the plaintext frame.
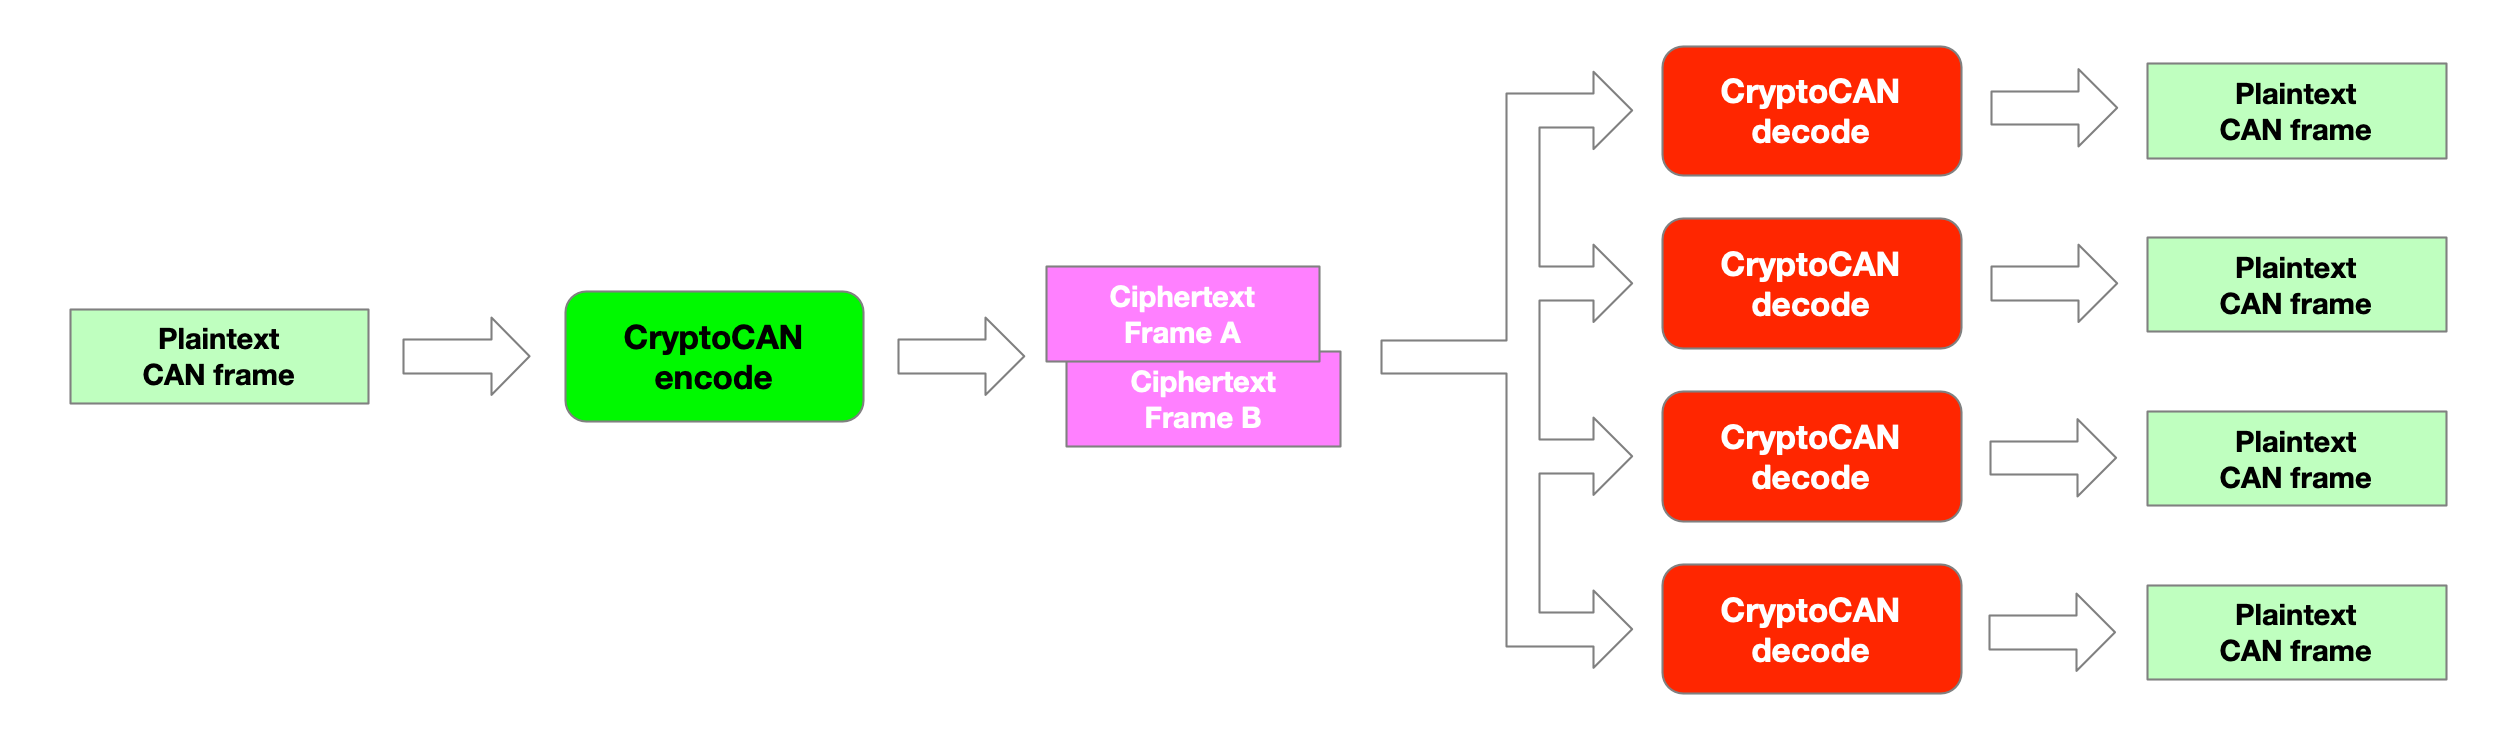
The ciphertext frames contain not just details of the original frame (payload, DLC) but also a message authentication code (MAC). The MAC is used to detect tampering or forgery of the ciphertext message and the decoder will discard frames that don’t verify.
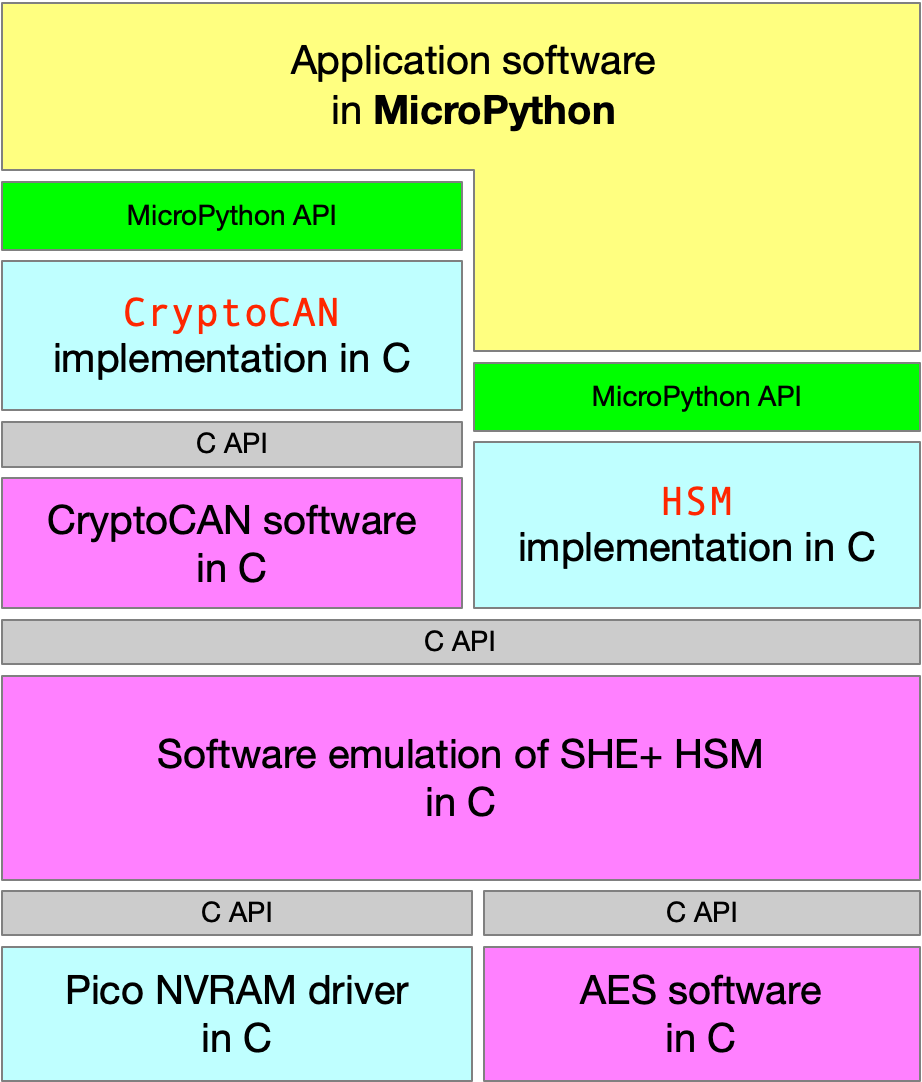
CryptoCAN is normally provided as an embedded C library but it’s also been made available in the latest release
of our MicroPython firmware for the CANPico board, with the C API wrapped up
into a Python API with two extra classes: HSM for the hardware security module and CryptoCAN for the messaging.
The HSM is, of course, a pure software implementation of an HSM (following the SHE HSM standard used by AUTOSAR)
and stores its keys in a tiny file system in the Raspberry Pi Pico’s flash chip.
This blog post is a guide how to get started with using CryptoCAN on the CANPico. The firmware will actually run on an
ordinary Raspberry Pi Pico board but without the CANPico board the CAN class can’t be instantiated
(since it tries to talk over SPI to a CAN controller that isn’t there), but the CryptoCAN and HSM APIs
will work.
First step is to install the firmware. This is done in the normal way: press and hold the white BOOTSEL button while powering up. The board then starts as a USB disk, and the firmware can be copied to the file system. You can download the latest firmware from [canislabs.com/cryptocan][https://canislabs.com/cryptocan]. It comes in a ZIP file with a README pointing at resources.
The next step is to make a CAN system from a couple of CANPico boards.
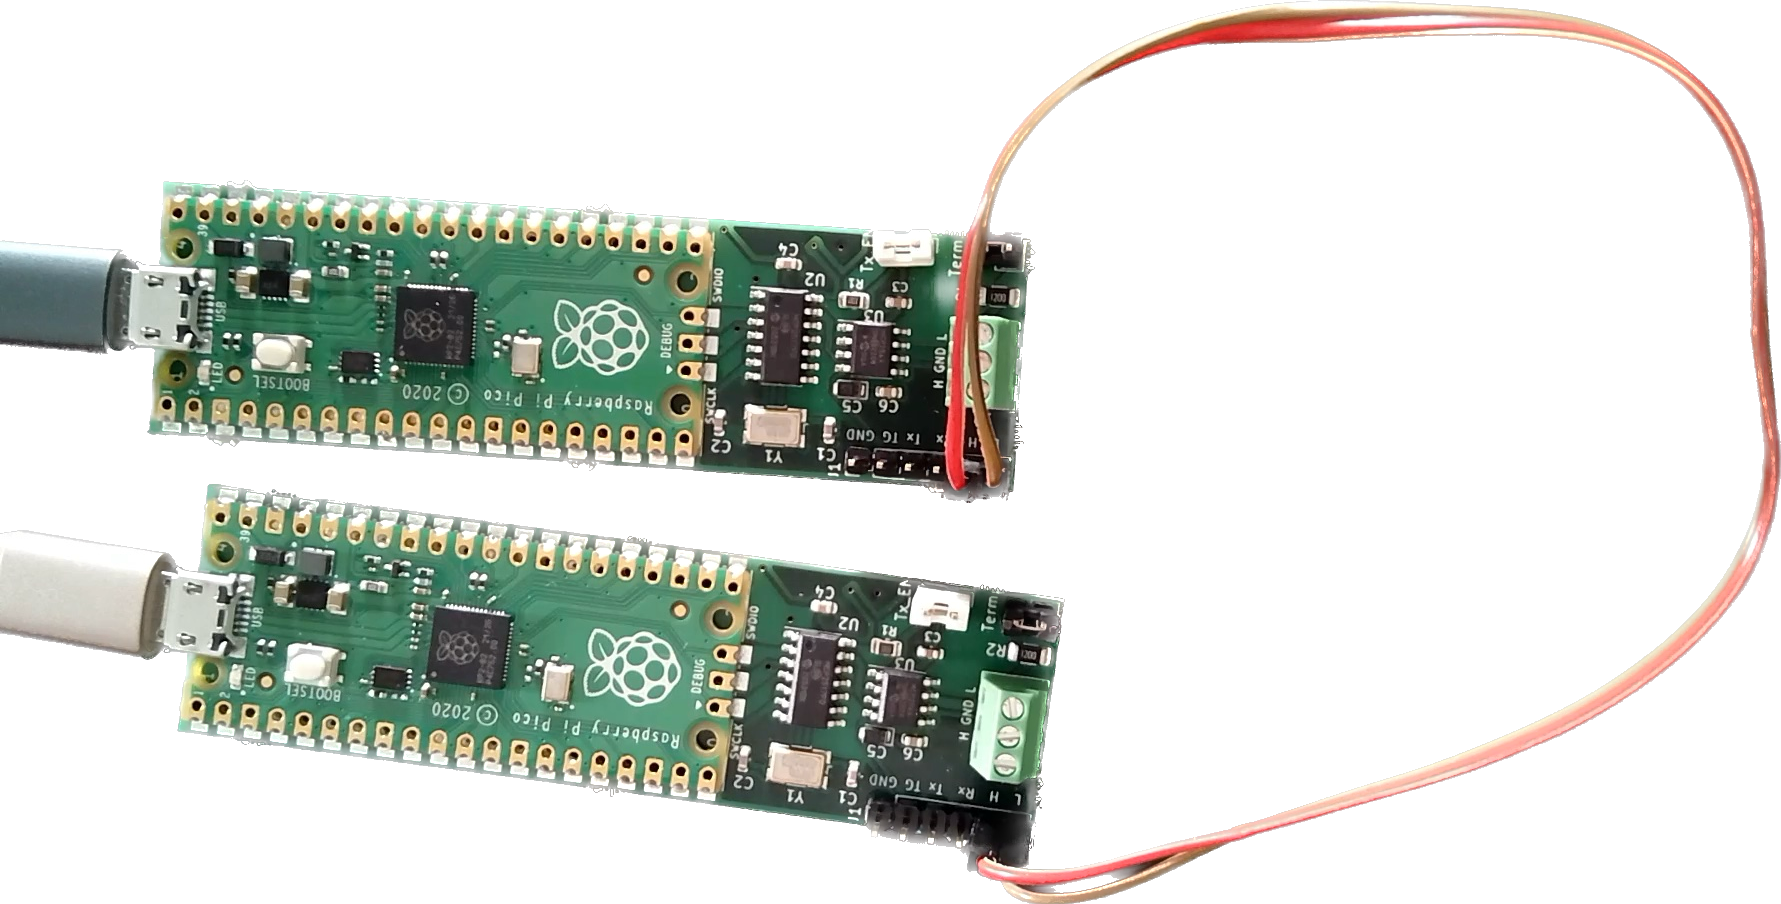
Normally the screw terminals would be used to make a CAN bus but here we can just use a pair of breadboard wires on to the debug header (the jumpers are set to enable the termination resistors on the boards).
Each board appears on the host as a USB serial port (in fact, each board has two ports: the first is connected to the REPL commandline, and the second is used the the MIN protocol that’s also burned into the firmware). Any terminal emulator can be used but I like to use the rshell package.
The next step is to provision the HSM. This only has to be done once to embed a ‘secret key’ into the HSM (this is
the key that’s the top of the hiercharhy, and used to set the master key that itself is used to set application
keys). If the HSM were a real SHE HSM then this wouldn’t be necessary (since the keys are burned in at the factory)
or possible (since a factory reset isn’t allowed by the SHE HSM standard - forget the keys and the chip becomes
a brick). Because CryptoCAN on the CANPico is designed to be used to evaluate CryptoCAN and learn how things work,
we’ve added the ability to do a factory reset on the HSM: this is done by setting a secret_key parameter when the
HSM class is instantiated.
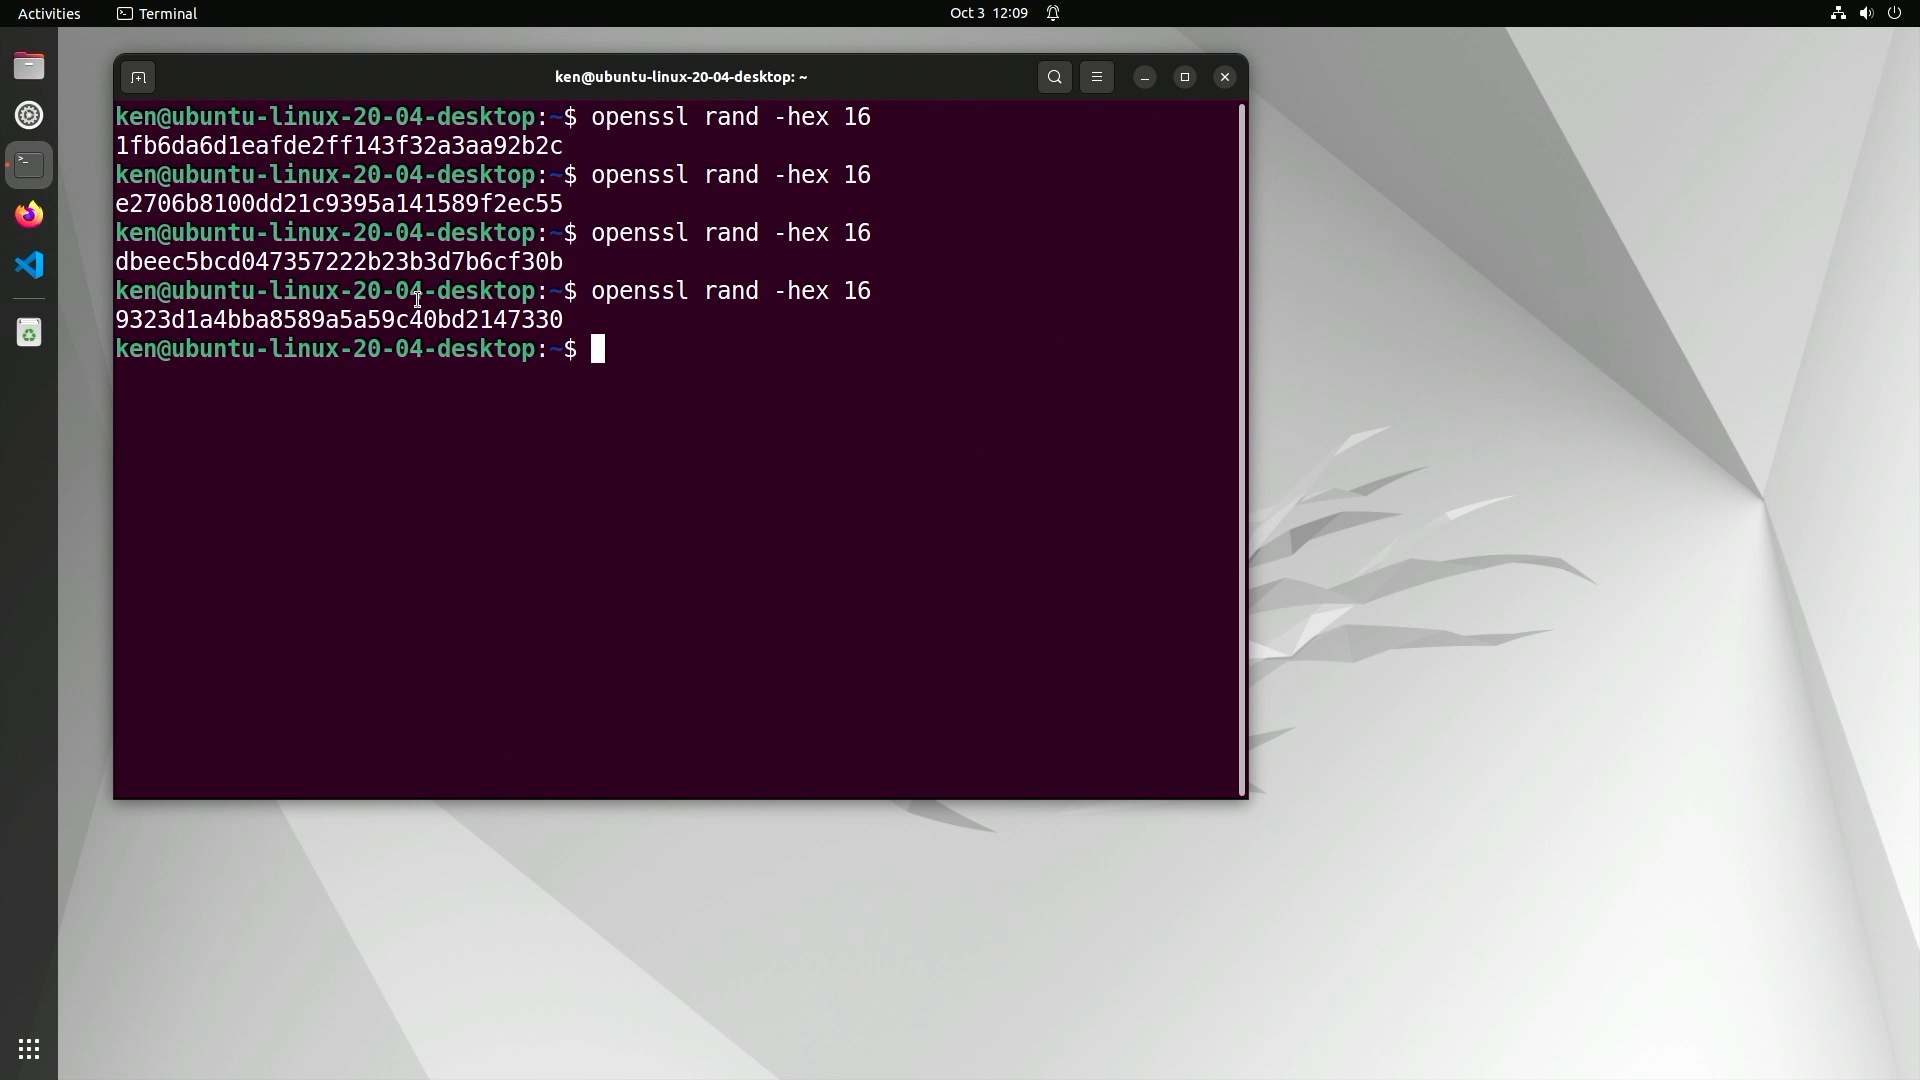
For our two-board quickstart we will need some random numbers: two for the secret keys in the HSM, and two for each
encryption/authentication pair that CryptoCAN needs to make ciphertext messages. To get started, we only use
a single pair of keys for CryptoCAN (and they’re the same at both ends). So we can make some random keys any
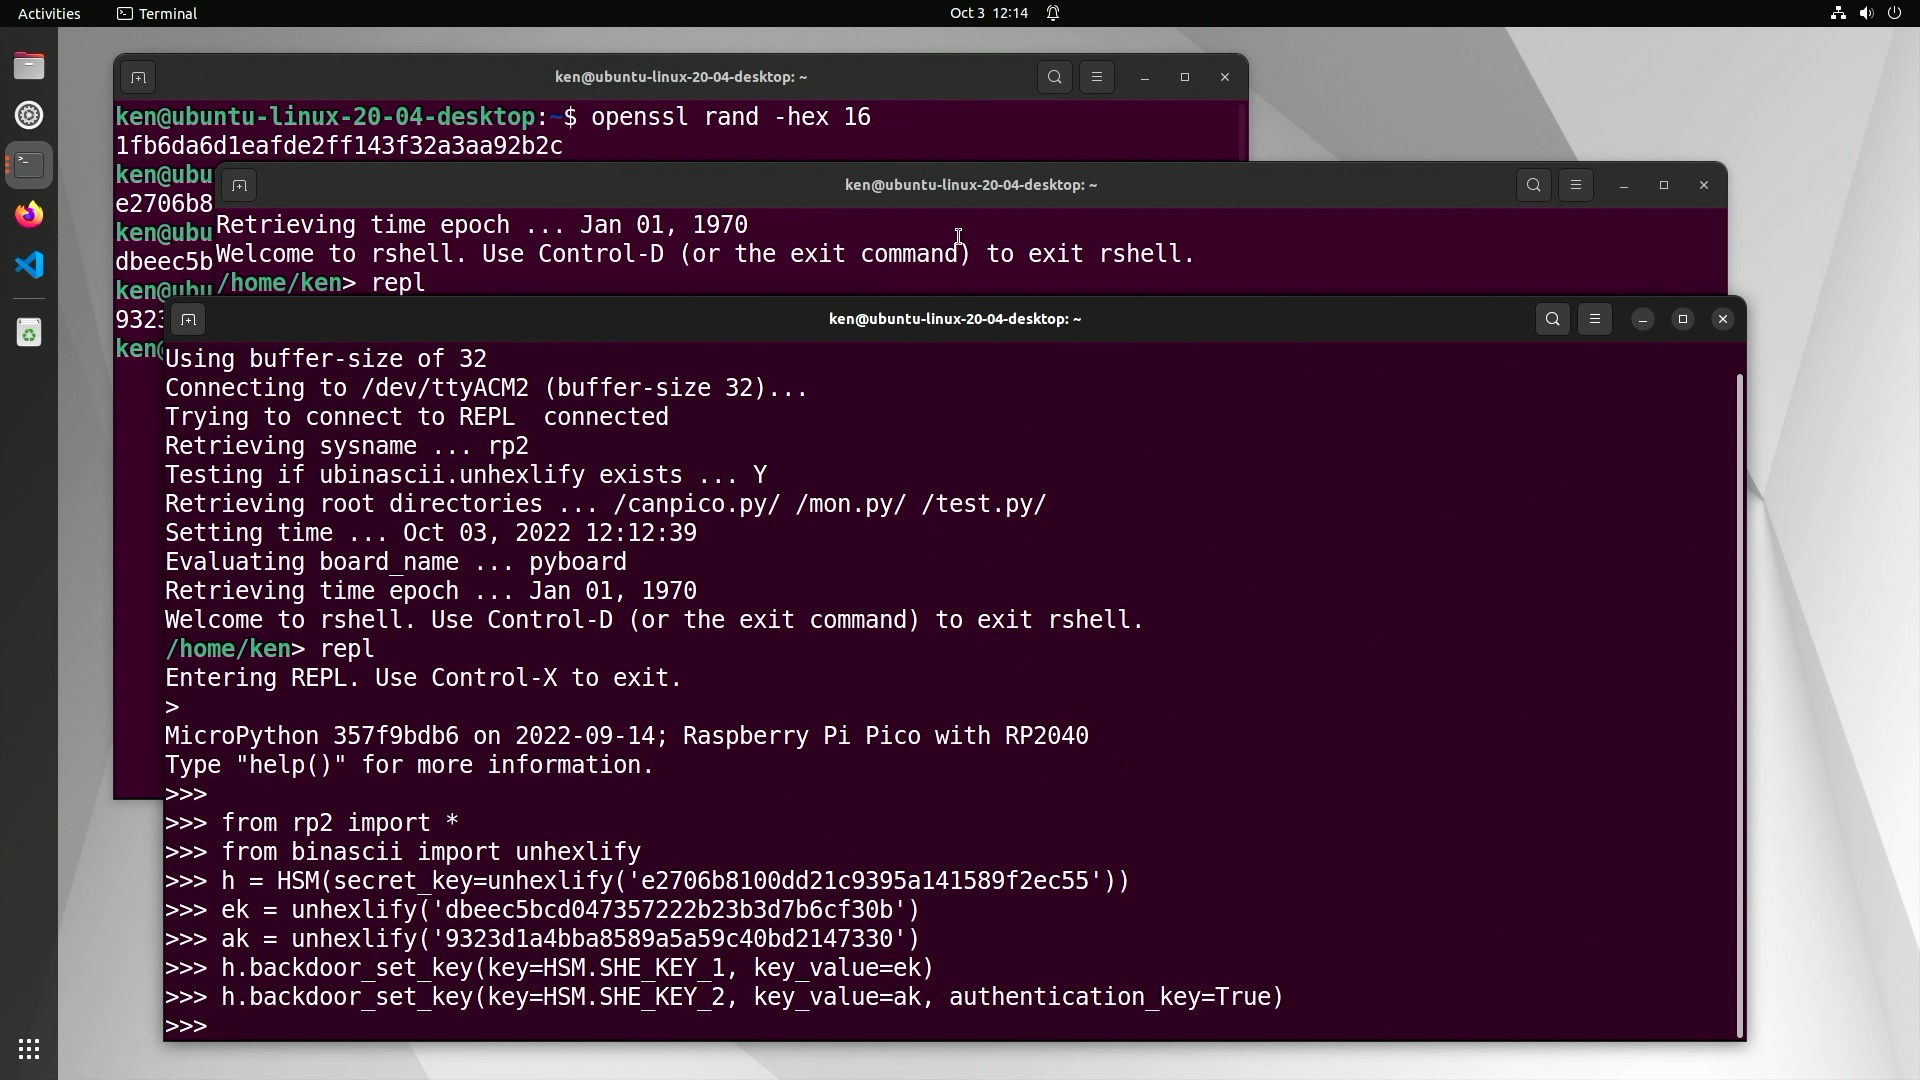
way we like, but I like to use the openssl commandline built into Ubuntu:
Then we log into a CANPico board from the REPL command line and start by importing the Python modules we need:
1
2
>>> from rp2 import *
>>> from binascii import unhexlify
The first brings in all the CANPico modules, including CAN for the CAN controller, CANFrame and CANID for
defining CAN frames, as well as CryptoCAN and HSM. The import of unhexlify is a useful utility that’s
part of standard Python for taking hex digits and producing bytes, and we use this for copy-and-paste of the keys.
Instantiating the HSM is done like this:
1
>>> h = HSM(secret_key=unhexlify('<secret 16-byte key in hex>'))
Once we have an initialized HSM we can then use it.
For secure messaging with CryptoCAN we need to set application keys. Normally the SHE HSM defines a secure mechanism for secure key setting that allows the new key value to go over an insecure channel, but it’s quite complex and requires a tool for computing the special message, verifying the response, and keeping track of values in a key database. That makes for a too steep learning curve, so we have added a simple ‘backdoor’ key setting API to just push the key values we want into the system. This isn’t possible with a real SHE HSM and the API call shouldn’t be used beyond early exploration of the concepts (in any case, the API call will be removed in a future release of the firmware).
An encryption key is set using the backdoor API like this:
1
>>> h.backdoor_set_key(key=HSM.SHE_KEY_1, key_value=unhexlify('<16-byte key value in hex'))
And an authentication key is set like this:
1
>>> h.backdoor_set_key(key=HSM.SHE_KEY_2, key_value=unhexlify('<16-byte key value in hex'), authentication_key=True)
Our example REPL session looks like this:
In the SHE HSM specification, keys have permissions attached and can be used either for encryption or for authentication, but not both (there are attacks on messaging schemes if the same key is used for both). The
specification also provides for ten application keys (SHE_KEY_1 to SHE_KEY_10). Other keys can be programmed, but these are special keys with defined meanings.
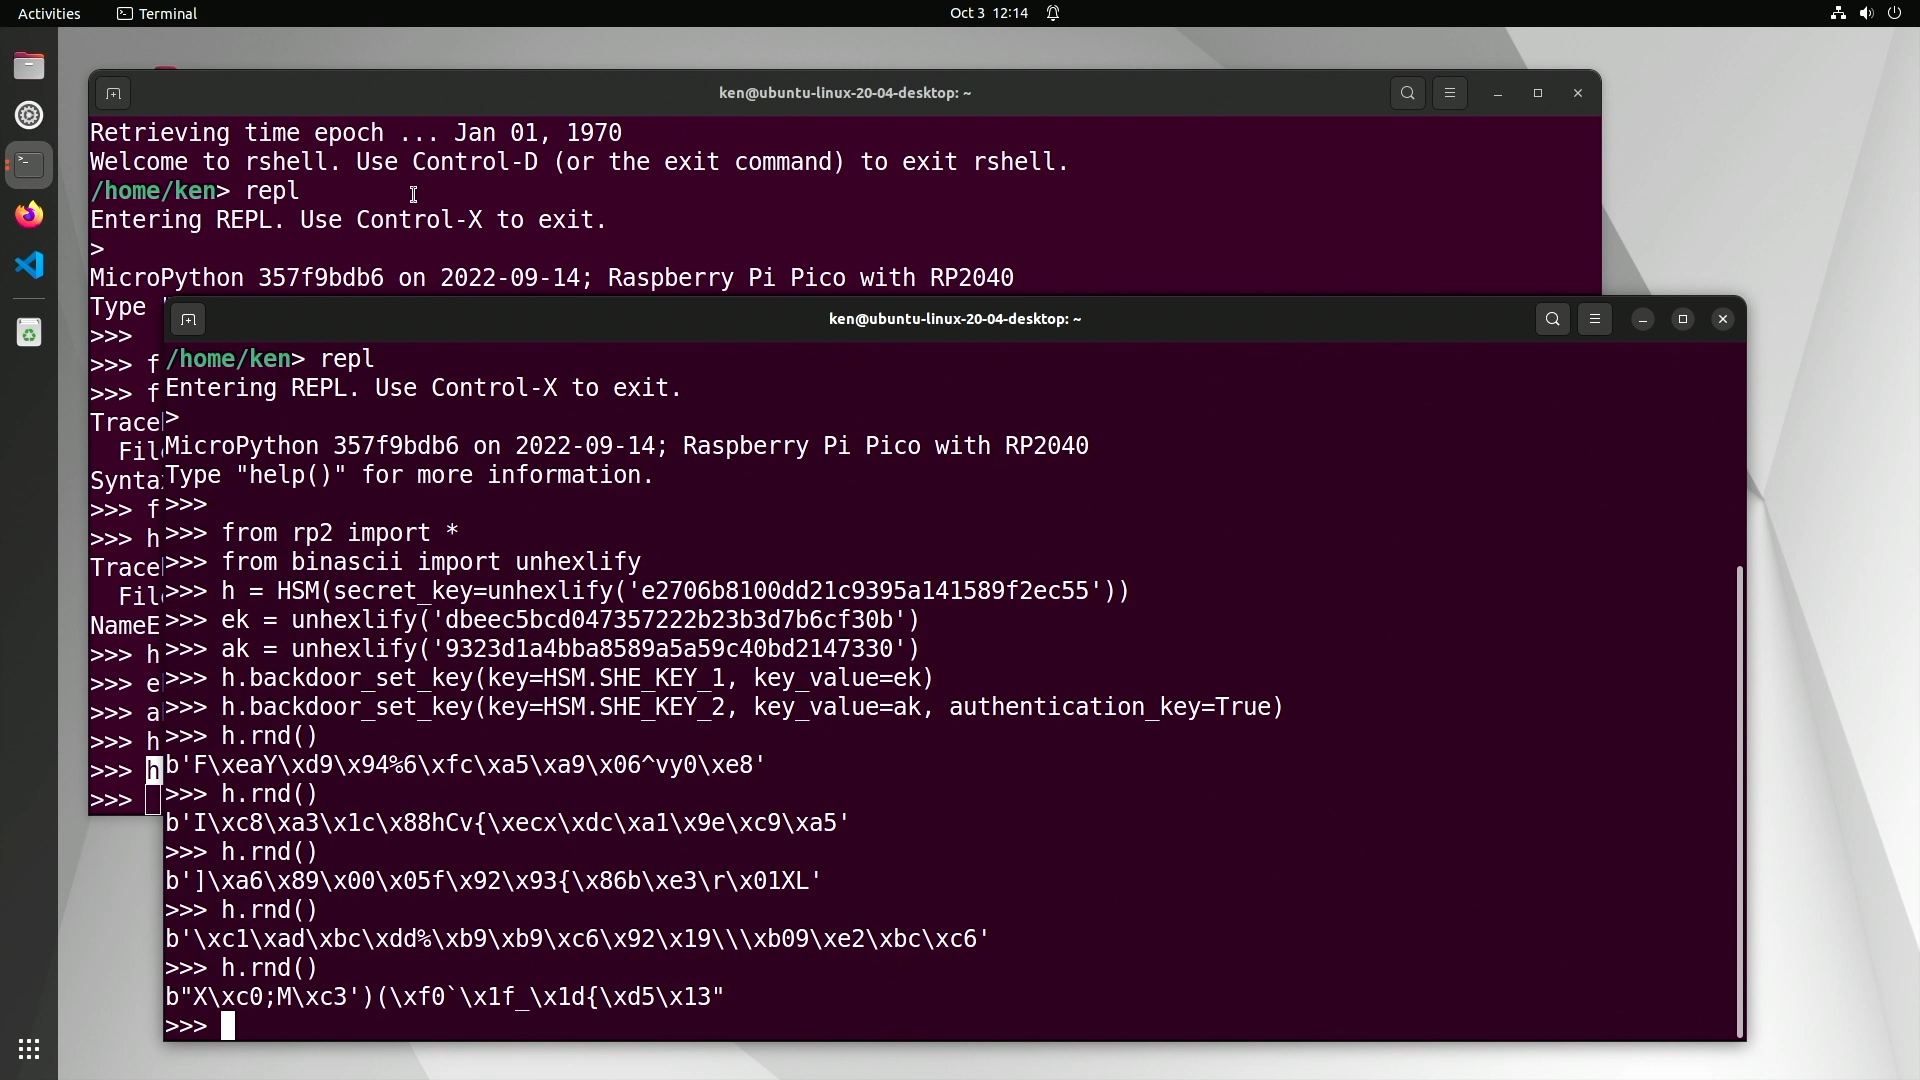
Once we have a provisioned HSM we can use it. Obviously that includes for messaging, but we can use its cryptographically secure random number generator (CSPRNG):
Now that the HSM is factory reset and provisioned with application keys, we can create a CryptoCAN context at the sender and the receivers (we only have one receiver in our little CAN bus system, of course).
At the start we need to initialize the HSM and the CAN controller on each board:
1
2
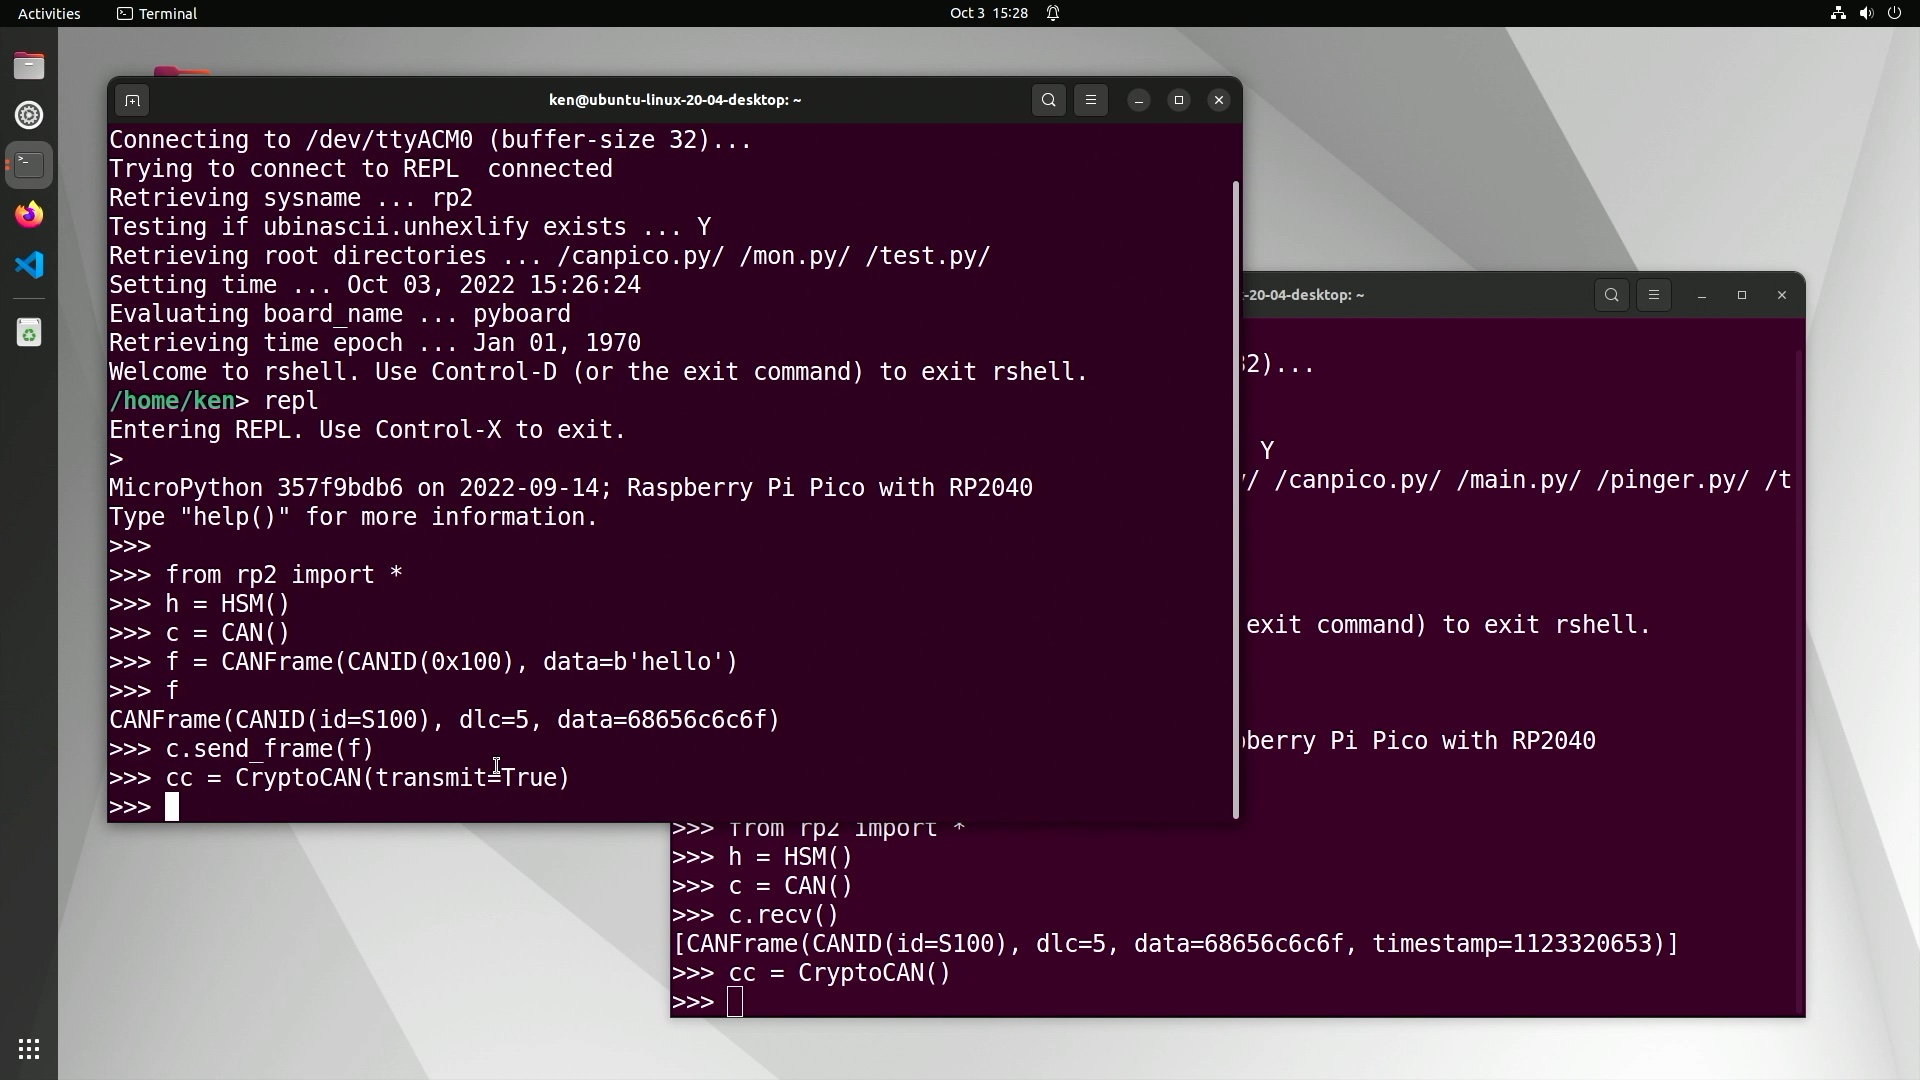
>>> h = HSM()
>>> c = CAN()
Then on the sender, we can create a simple ‘hello’ CAN frame:
1
>>> f = CANFrame(CANID(0x100), data=b'hello')
This creates a 5-byte CAN frame with standard 11-bit ID of 0x100 and a payload of ‘hello’ in ASCII.
We can check that the CAN bus is working by sending it over CAN. On the sender:
1
>>> c.send_frame(f)
And then on the receiver:
1
>>> c.recv()
That should display the received CAN frame, like this:

Once we have a working CAN bus, we’re ready to start encoding and decoding with CryptoCAN. On the sender, we
create a CryptoCAN context with the CryptoCAN class. A context stores data about how the frames have been transmitted and received, and uses this retained informationt to generate ciphertext frames or decode and verify
them. A context defines two things: the key pair used (encryption and authentication) and the B Flag. The B Flag
is a bit in the CAN ID used to identify if the frame is the first frame of a pair (Frame A) or the second
frame of a pair (Frame B). It’s also there to ensure that when the pair of frames get put into a CAN controller
together that Frame A is of higher priority and transmitted first (although most CAN hardware can be set to
arbitrate internally by CAN ID, two frames with the same ID can be transmitted in either order on the
CAN bus).
A CryptoCAN instance defaults to SHE_KEY_1 for the encryption key, SHE_KEY_2 for
the authentication key, and bit 0 of the CAN ID for the B Flag. The sender creates the context with:
1
cc = CryptoCAN(transmit=True)
and each receiver with:
1
cc = CryptoCAN()
A context is required for each source of CAN frames. They can have different IDs but the receiver context must see all frames produced from the sender’s context. This is designed to fit with a scheme like J1939 where the CAN ID is used to encode certain data. Incidentally, a good place for the B Flag in J1939 systems is bit 26, the least-significant bit of the priority field.
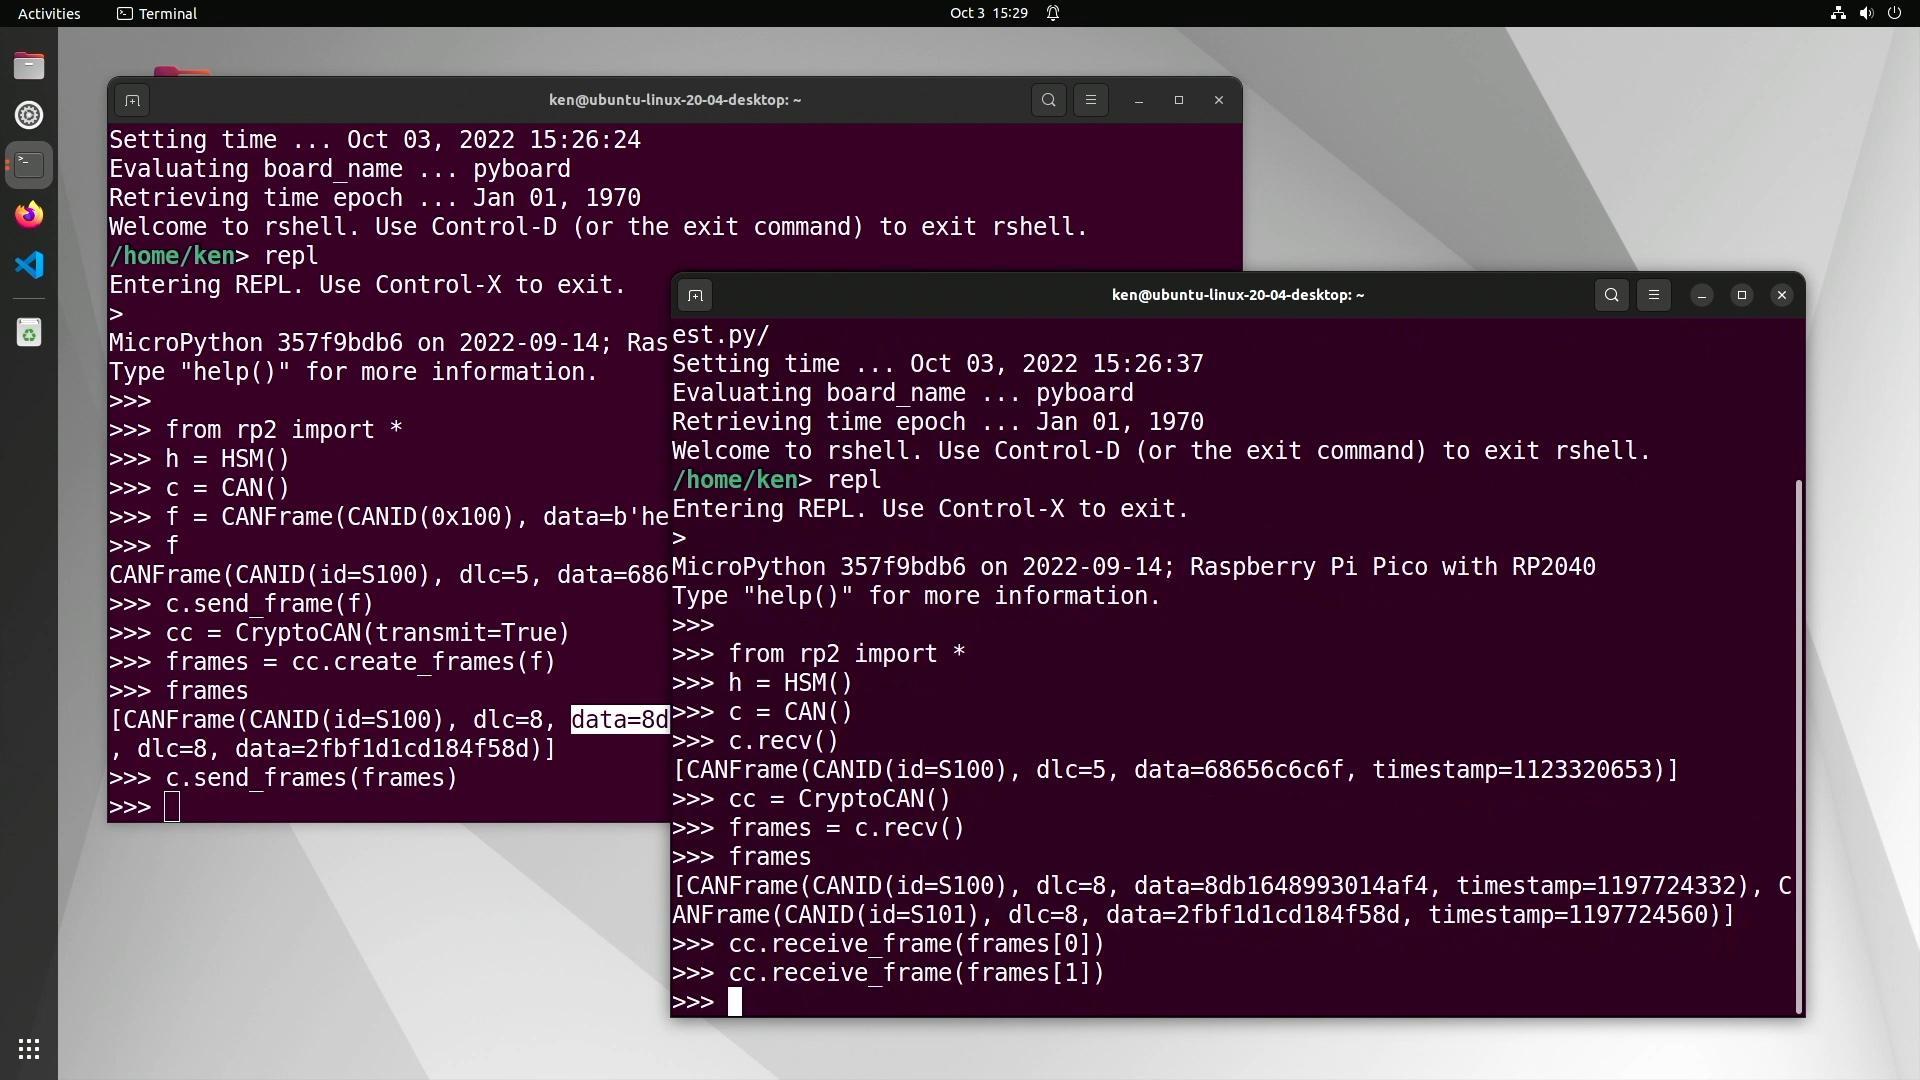
Once the contexts have been set up, messaging can start. A pair of ciphertext frames is created with the create_frames call:
1
>>> frames = cc.create_frames(f)
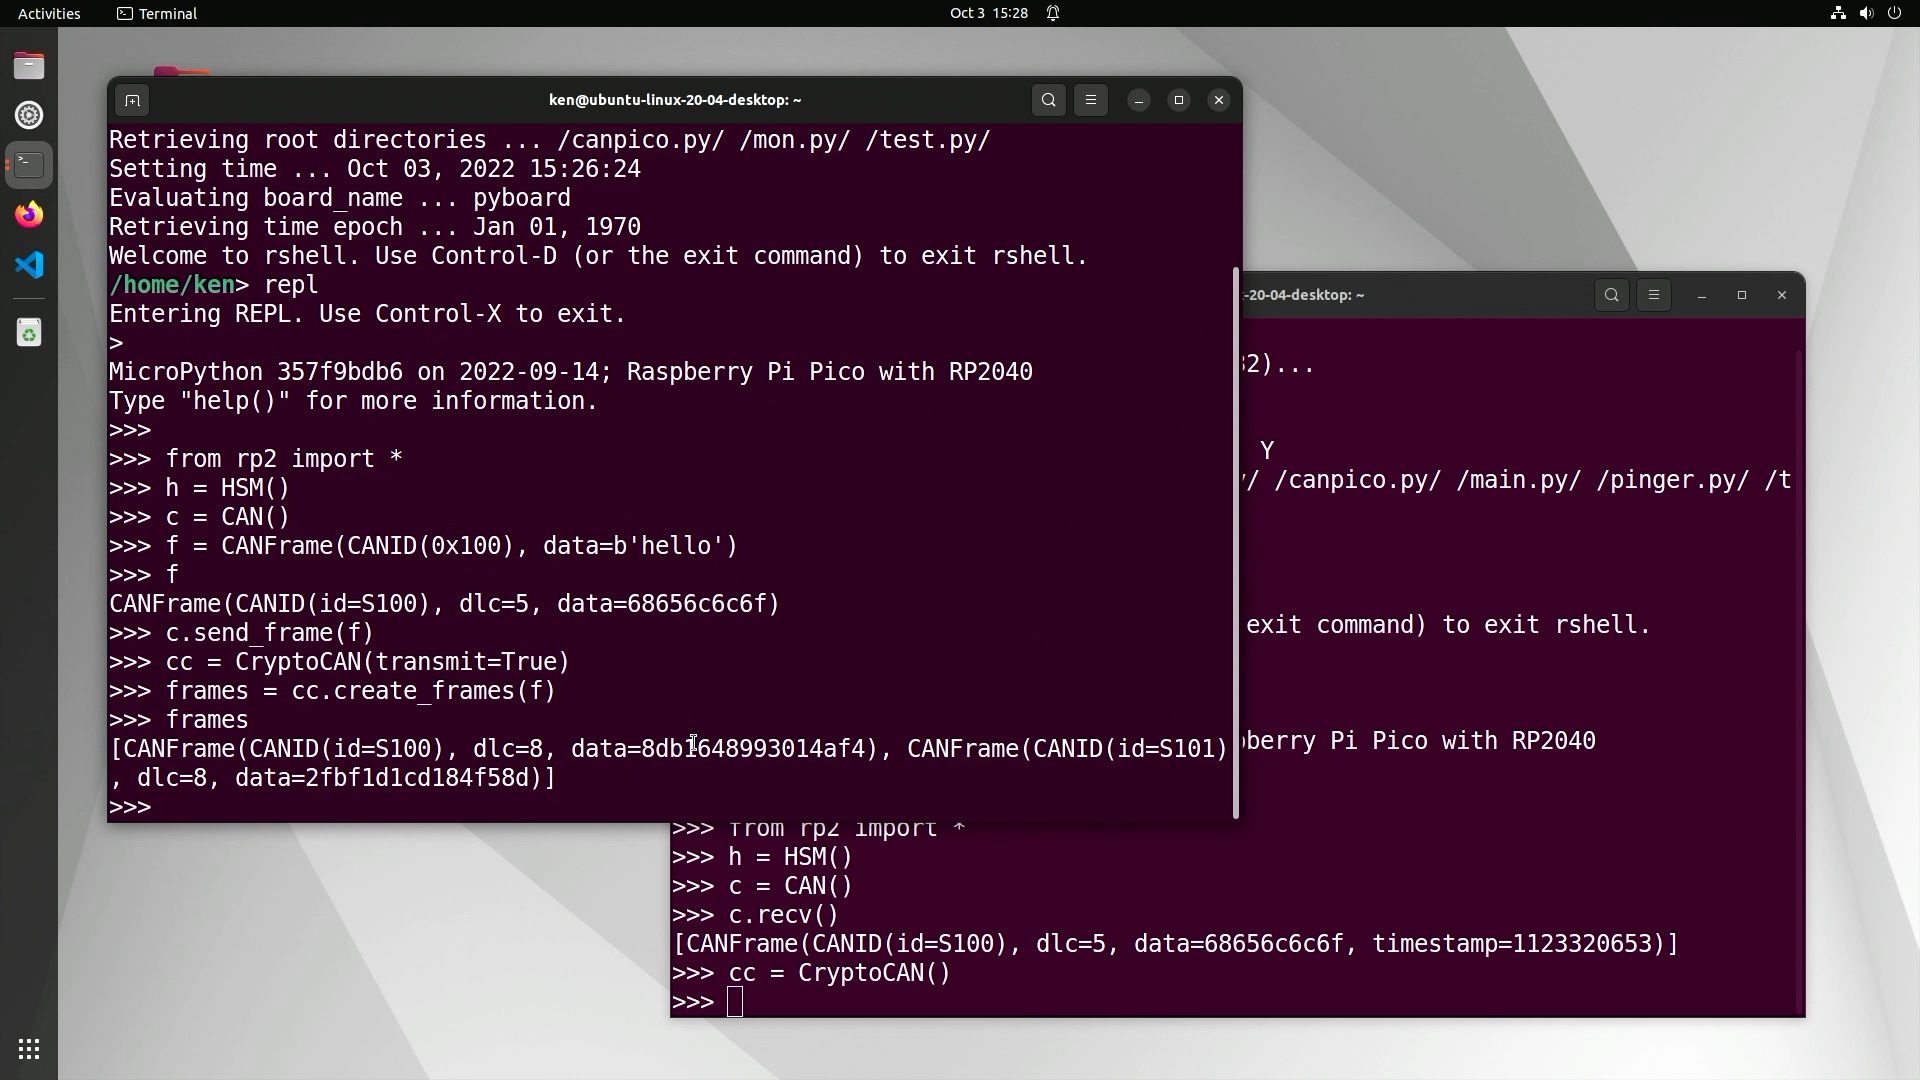
Notice how the second frame of the pair has CAN ID 0x101: it has the B Flag set.
The ciphertext frames can be transmitted over CAN and then each pushed through the receive context:
1
2
3
>>> frames = cc.recv()
>>> cc.receive_frame(frames[0])
>>> cc.receive_frame(frames[1])
The code above is very simple, and assumes that all the frames from the CAN bus are destined for the single CryptoCAN context. In a real system, the CAN ID would be used to decide which context (if any) the frames should go to.
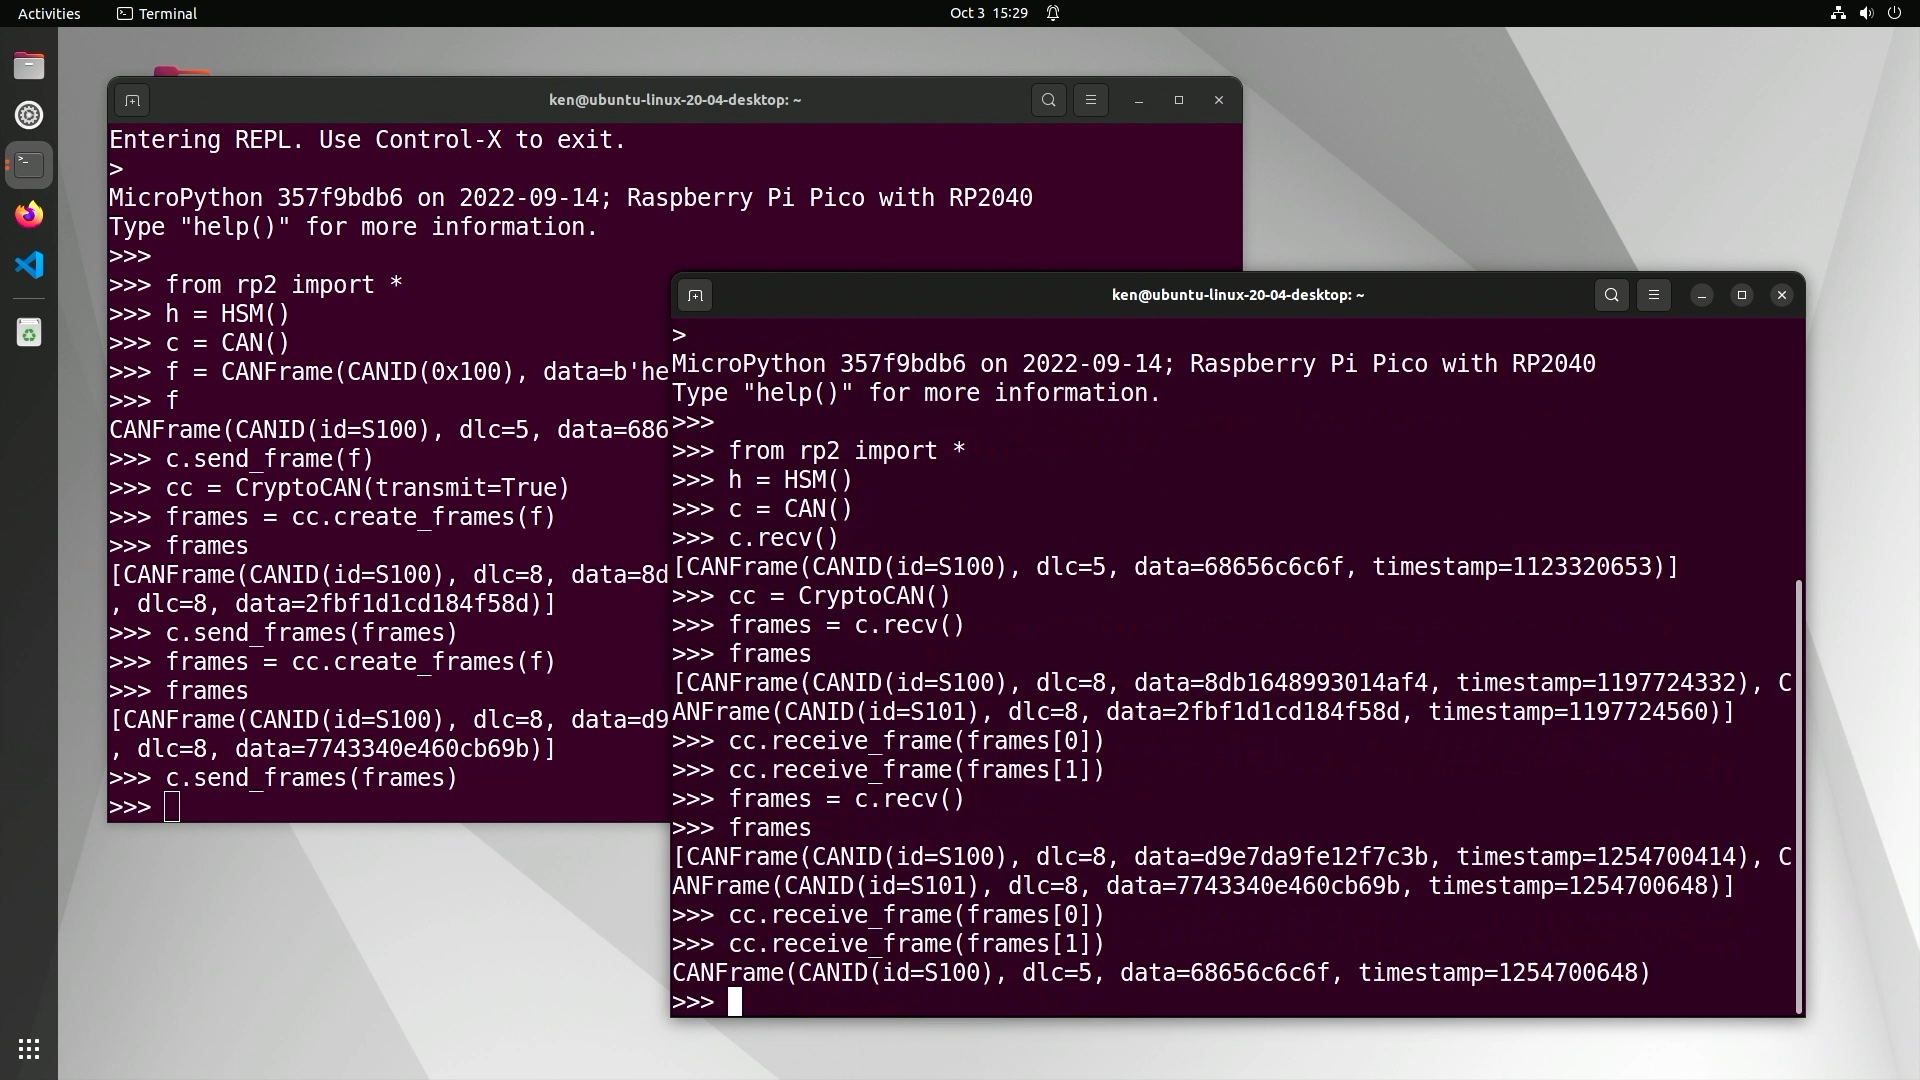
With CryptoCAN, the first encoded message is always dropped. This is because the encryption scheme needs the previous ciphertext to decode the next, and the first time the context is used it doesn’t have that. But the rest of the ciphertext messages do decode:
Interestingly, because CryptoCAN is an end-to-end scheme, we don’t actually have to send the frames over CAN bus. We can create frames from the sender context and then manually assemble CAN frames at the receiver from the information about those ciphertext frames (most notably the payloads) and then feed them into a receiver context:
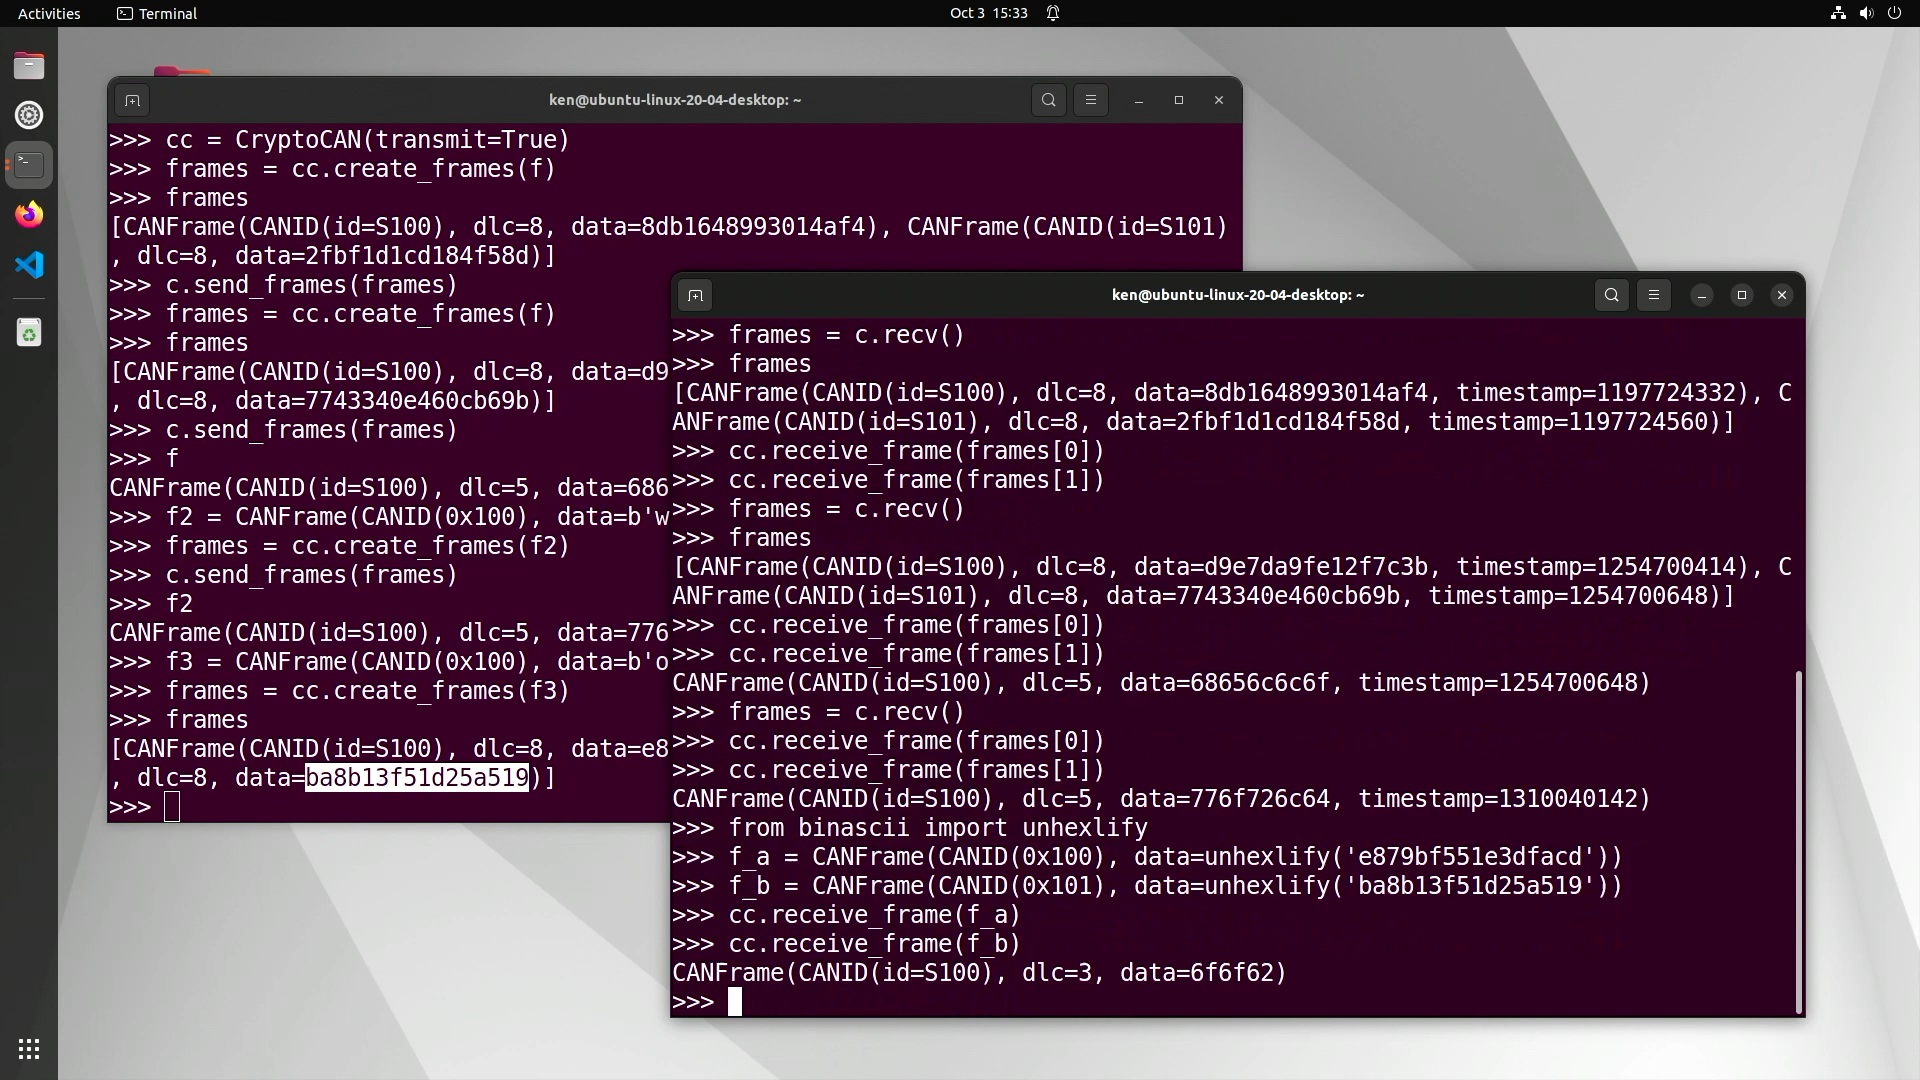
In the above session, we created a frame with payload oob in ASCII (hex 6F6FF2) and then created
two CANFrame instances to reflect the ciphertext frames simply by
pasting the ciphertext payloads from the sender’s REPL terminal session to the receiver’s. More usefully,
we could encode CAN frames into a TCP/IP socket over a WiFi connection and then a receiver could re-assemble
the data into CAN frames and then push them through the receive context. In fact, MicroPython CAN API for the CANPico
has functions to encode CANFrame instances into a block of bytes, and vice versa: these calls are designed for moving
CAN frames over another transport protocol (such as MIN).
So that’s a quickstart for CryptoCAN. There are more advanced features of CryptoCAN that we haven’t discussed here, such as protection against replay attacks. This is where an attacker copies a sequence of messages and replays them on the bus later to get receivers to act on them: the attacker may know from observing the bus what the messages mean (like unlock all the doors) and even though they can’t make valid messages they can just take old ones and send them again. CryptoCAN has features to protect against this by including the MAC calculation a freshness value that indicates when the message was created, and old messages won’t verify. We’ll cover this in more detail in the future.
For more information on CryptoCAN, go to canislabs.com/cryptocan. As well as the CANPico firmware, there’s a reference manual for the Python API and also a cheatsheet that summarizes the whole MicroPython CANPico API.
There is also a video overview of CryptoCAN that includes a walkthrough of getting started with CryptoCAN on the CANPico.
